


Beginning
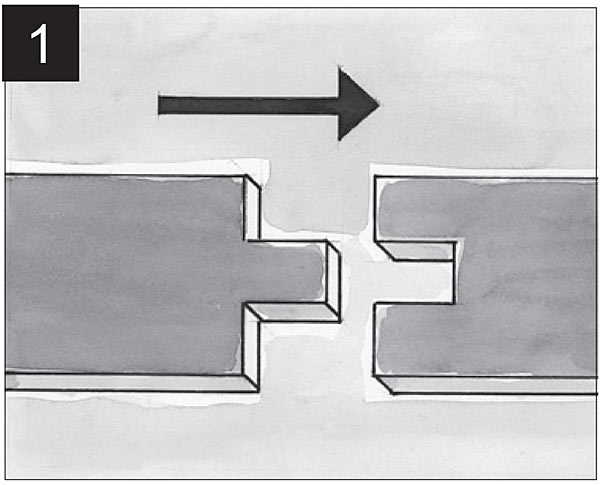
Solid wood flooring units have a tongue and groove both on the longer and shorter side and therefore the units are easily and quickly laid.
Gluing the flooring units
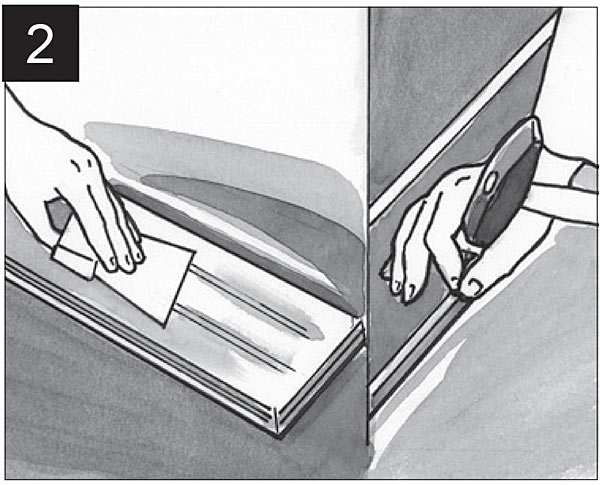
Use a parquet glue designed for laying larger units with a long open time. To apply the glue use a toothed screed 100/1250G. In every third row, nail the flooring units in the tongue on the longer side. Put a headless nail for each 1 meter of the board length.
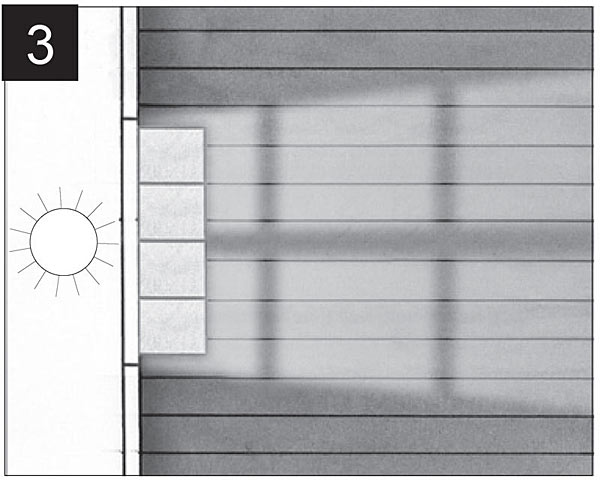
To achieve the great look of a large space, lay the flooring units in the direction of the longer side or parallel with the largest window. Make sure the panels are mixed sufficiently when you install them so that you do not end up with too many identical, light or dark panels next to each other. It is recommended to pre-assemble few floor boards before gluing them down.
The first row
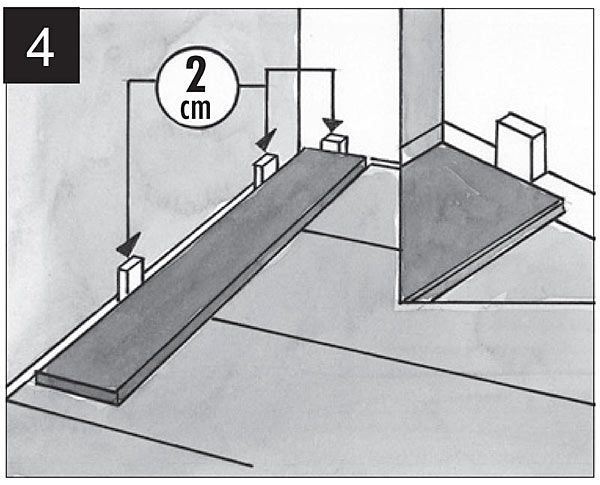
Start at the left corner of the room’s longer wall. Work from left to right. With the tongue (the protruding side) pointing away from the starting end wall. Put some fix spacers to create 1.5 to 2 cm gap between the wall and the floor to create the necessary expansion joints. For more about nailing see Figure 2.

Lay the first run of flooring units with the shorter side into one another. They must fit tightly together, free of any gaps. Check the alignment of the long edges with your square to insure that the first row is straight. When you reach the wall at the end of the run, carefully measure and cut the last piece making also the 1,5-2 cm expansion gap. Make sure that you measure from the correct end to fit into the adjacent piece. Use a square to ensure a straight cut. Place the end unit in the first row to the wall. Use a wedge, pulling iron and a hammer to drive the tongue and groove together.
Check the distance to both walls along the long edge. This will ensure that the boards are as square as possible in the room. Once you have the first row as straight as possible, nail each unit to the subfloor. Make sure that this first row is tightly nailed as it will set the alignment for the remainder of the flooring.
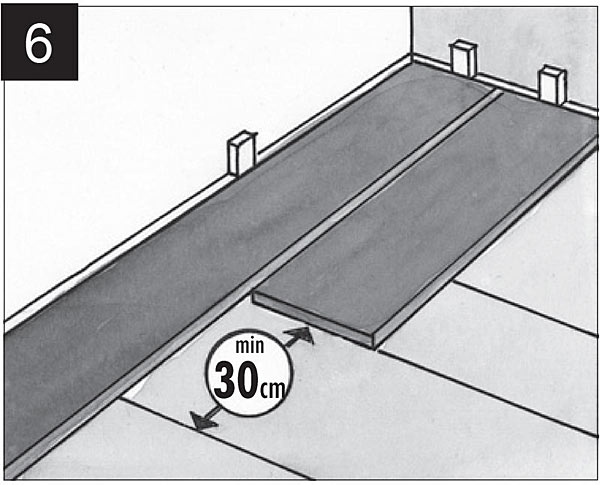
The Second Row
Start the second row with the unit that was cut to finish the previous row. This unit must be at least 30 cm long. Be careful so that the joints of the shorter sides are always shifted by at least 30 cm against the previous row. This reinforces the construction and creates a nicer visual effect.
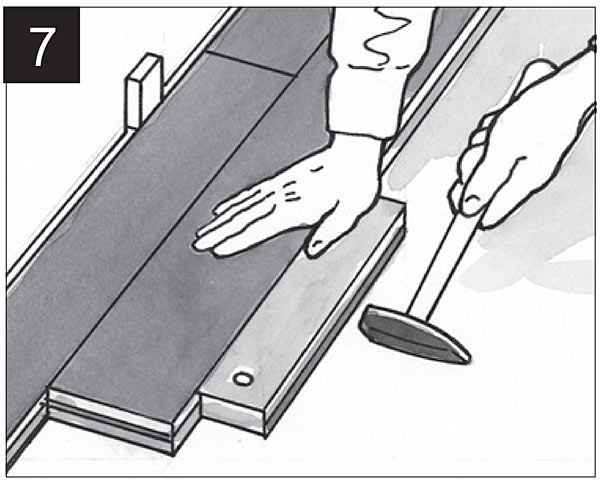
Lay the second row as tightly to the first one as possible. Insert the longer side into the first row. Then insert each follow unit into the previous row. Use a tapping block and a hammer to drive the tongue and grove on the ends together.
Other rows and completion
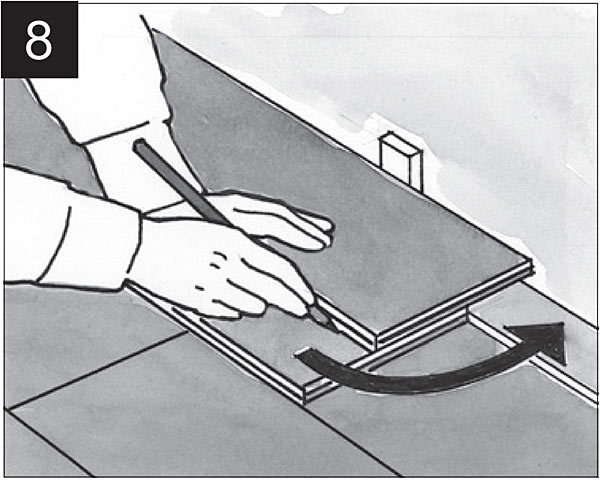
The last row
You will probably have to cut the last row. Always lay one unit precisely on top of the flooring unit of the preceding row. After that lay another board on top towards the wall (using the spacers to create expansion joint). Outline the board which is in between two boards, cut it off, and insert in the previous row. Again, use the pulling iron and the hammer for the end unit.
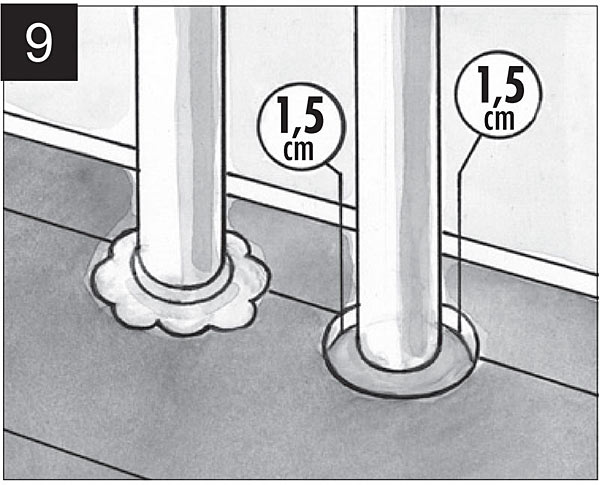
Use a jigsaw or a hole saw in a drill to cut precise round openings for the heating pipes. Add 1,5 cm to the pipe diameter to create an expansion joint due to wood expansion. Finish with a rosette. Use skirting along the walls to cover the expansion gaps.
After the recommended period of time required for the adhesive (glue) to harden, the floor can be sanded again with grid P100 and P120. Notice: the floor should be sanded only in case the floor is not finished in factory.
Enjoy your floor!
Sawing, sanding and machining wood products can produce wood dust. Airborne wood dust can cause respiratory, skin and eye irritation. The International Agency for Research on Cancer (IARC) has classified wood dust as a nasal carcinogen in humans. Protect yourself appropriately.